Discover what's new for Fall 2024

Setting Up a Low Budget Soundstage

The art of creating a believable world starts by creating a believable environment for your story. While shooting on location may be ideal, some shoots require a built set.  The challenge facing every filmmaker is how to get the most for money.  Building a set doesn’t have to be expensive – creative thinking and utilizing available resources are the best way to start.

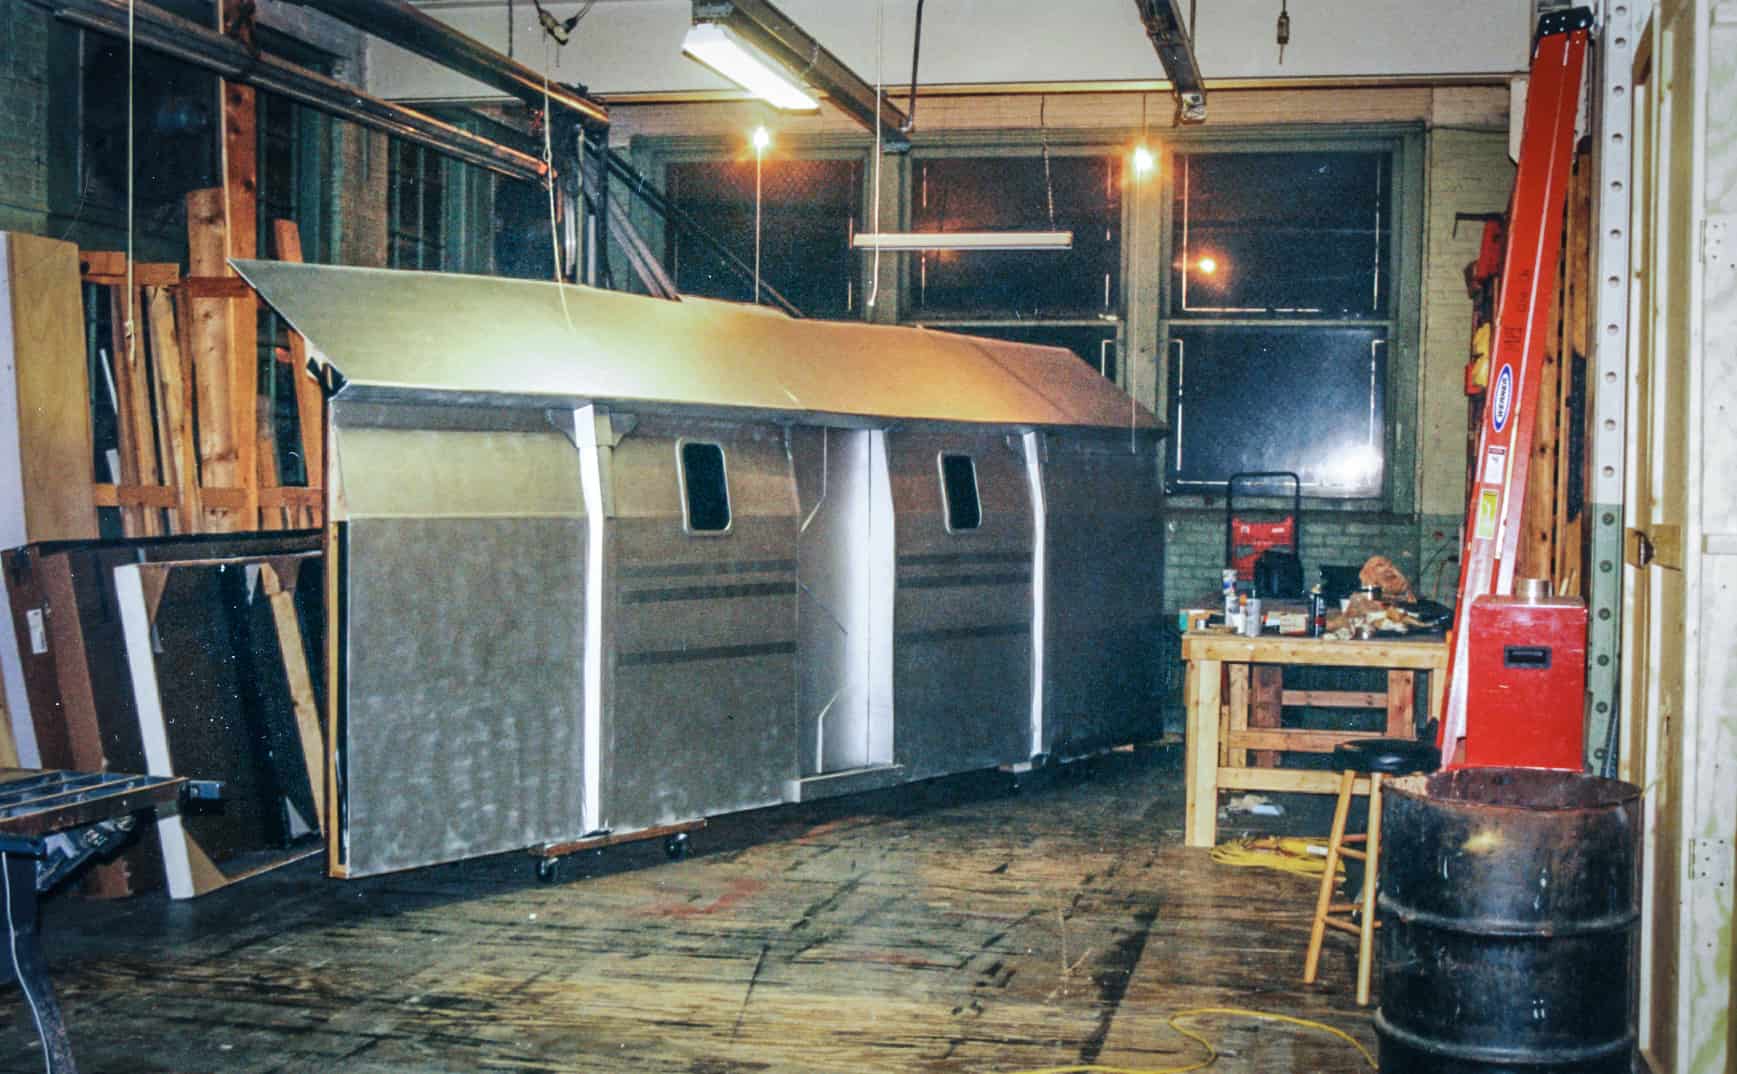
Ideally movie sets are built on soundstages equipped with sound-reducing walls, a light grid for rigging lights and set pieces, ample power, large doors for loading and unloading, dressing rooms, production equipment and even a kitchen. Unfortunately many low budget productions can’t afford proper production facilities, but with some creative thinking you can adapt an existing building into a makeshift soundstage. And the art of building a low budget soundstage means finding that balance between cost and the look.

The first step is to find a large facility in which you can build a set but also meets the technical needs of your production.

  • Vacant Buildings – Landlords of vacant commercial properties may be willing to give you a space for free or for a heavily discounted rate if you plan on using it for a short time. Make sure the building still has utilities such as power and running water. Empty grocery stores, shopping malls, strip centers and factory buildings provide plenty of room to work, spacious parking, loading areas and sufficient power.
  • Accessibility – Make sure that the rental space has a loading dock or is otherwise accessible to trucks so that you can bring lumber, set dressing, and production equipment. If you plan on building flats, make sure there are large doors called elephant doors that can accommodate 8’ or 10’ tall flats.
  • Power and Utilities – Check the power and circuit configuration in the building to ensure that it can support the electrical draw of the lighting gear. Also make sure the water and toilet facilities are in good working order and there is heat, especially in the winter.
  • Ambient Noise – Listen to the ambient sound outside the building. Warehouses or gymnasiums aren’t designed for the acoustics needed for film production. Avoid buildings near freeways or heavily trafficked areas.
  • Parking – Make sure there are ample parking spaces for the cast and crew and any equipment trucks.
  • Garbage – If you are planning on constructing sets, you’ll need to dispose of the excess materials, garbage, and when the shoot is over, the set itself.  Because the landlord may not (and should not) be responsible for your garbage, you may need to contact a local company to rent a dumpster.
  • Security – Always ensure the building can be secured, and never leave any valuable gear there unsupervised. That absolutely includes cameras, camera gear, lenses, and computers.

Finding an empty commercial property may be a great way to cut corners on your budget, all while providing a lot of space.  Just be aware of the limitations before you start, and you should have a smooth production experience.

The Power of Light and Shadow in Cinematography

It would make sense that lighting a subject would involve aiming a light at the subject and turning the light on.  While this rather direct approach works some of the time, it often makes harsh shadows and creates a very unnatural look, especially when that light is the key light.

Remember that good lighting involves making shadows, provided those shadows are in the right place. In real life, we humans are able to determine depth and distance because we have two eyes. Our eyes work together, each one seeing an object from a slightly different angle.  When our brain puts these two images together, we are able to see depth. This process, called triangulation, helps us determine the distance between objects or the distance from an object to our face. Incidentally, the closer an object is to our eyes, the more depth sensitive we are and the farther away it is, the more difficult it is to determine depth.  For example, if you hold your finger at arms length and move it 12 inches toward your face, your brain will detect that change in distance much more than if a friend, standing 100 feet away, moves his finger 12 inches closer to you.

It is for the same reason that it is difficult to tell how far away stars are relative to each other. The angle between the stars to our left eye and the stars to our right eye is so narrow, that we can’t tell how far away they are from us, or from each other.

Unfortunately, a camera doesn’t have depth perception because it only has “one eye…” the lens. So, in order to create depth, you have to use shadows, and shadows are created by lighting.

There are good shadows and bad shadows. Bad shadows are created when a light casts a harsh shadow of the subject onto the background, which draws the audience’s attention to the presence of the light.  Good shadows are created by proper light placement, resulting in contrast… one side of the subject is brighter than the other.  Instead of shadows being cast on the background, shadows are created by the object itself, on itself, like the earth and the sun.  One side of the planet is always in the light and the other side is always in shadow.

The transition between the bright and dark sides of a subject’s face is called the “wrap around.” A harsh, distinctive line between the bright and dark sides of a subject’s face is called a hard wraparound, whereas a soft, transition from dark to light is a soft wraparound.  Famous female movie stars of the 1940’s and 1950’s look glamorous because of soft wraparound.

You can create a soft wraparound by increasing the size of the light source – by adding a large diffusion in front of the light, reflecting light off a white piece of foam core (available at an office supply store), wall or other reflective surface. The larger the light source and the closer to the subject, the softer the wrap around. Learning these lighting techniques will greatly improve the quality of the movie image.

The Actor’s Responsibility

We often think of the director as the master storyteller, guiding the cast and crew towards one unified vision.  While much of the responsibility of crafting this vision falls on the director, the line can be come blurry between the director’s work and the actor’s responsibility.

For the actor, much of his work happens before the cameras even roll. The actor bears the responsibility of creating his character under the director’s guidance. By better understanding the actor’s process, you, the director,  can more effectively work with him to create a multidimensional character.

  • Backstory – The actor is responsible for creating her character’s backstory. What was her life like and what events in her life lead to the events of the movie? Although the director plays a role in helping the actor craft her backstory, she is solely responsible for doing the work.


Remember that good actors prepare for the role on their own. A good director is there to guide them… not do the work for them.


  • Research – It is the actor’s responsibility to do the research necessary to render an accurate on-screen performance. If the actor is playing a policeman, then he may consider working with a local police department to learn the life of a cop on the street. If she’s playing the British Queen, she must understand the life, customs, time period and behavior of a British Queen. Each role requires a different amount and type of research, the responsibility of which falls on the actor.
  • Delivery, Dialect and Behavior – If you’re shooting a period film, or a movie that involves a language other than the actor’s native language, consider hiring a consultant or acting coach to train the actor in the proper dialect or accent. It is the actor’s responsibility to learn the proper dialect of his character. In addition to the spoken word, the actor must also learn how to carry himself. Whether its learning the mannerisms of a real-life person for a biopic, or understanding the social morés of the 1890s, the actor has been hired to convincingly play the role and is expected to fully understand the person he is playing.
  • Memorize lines – This, although it should go without saying, is a the true mark of a professional. In the same way that professional crew members arrive on set with the tools they need to do their job, so too must actors arrive on set with their lines memorized and with a firm understanding of the scenes they are performing. Actors who don’t memorize their lines cost the production time and money as the crew much shoot take after take, all because of the actor’s lack of preparedness.
  • Know the objective of every scene – Talk to the director and make sure you’re clear about what the character’s goal is in each scene. What does he want and what is he doing to attain it? Know where the character is coming from in the previous scene and where he is going in the next scene. If you don’t know, then ASK!
  • Act the subtext –  Acting isn’t about reading lines; the dialog is a symptom of the deeper feelings and drive of the character. Act for the subtext, or deeper meaning, not the dialog. Ask yourself WHY the character is saying a certain line, what is the underlying motivation for this comment, and is that motivation the real driving force behind the movie?
  • Know the story – The process of making a movie means shooting it out of order. When shooting a scene, know where, how, and why it fits in the overall movie. Understand the complete plot and character arc so that when you’re asked to film Scene 46, you know what your character’s behavior, feelings, and motivation are in Scenes 45 and 47. When the editor edits Scene 46 together with Scene 45 (which you may have filmed a month later), the transition of performance must be seamless.

The director’s primary job on set is to work with the actors to get the best performance for the story, and this process begins long before the cameras roll, during rehearsal. Once the actors are cast, work with the actors to craft their character’s history, motivations, and subtexts so they can play their characters realistically during the time of their lives in which the movie takes place. This is when the homework you did by defining the subtexts, themes and motivations of each scene in your script is helpful.

How to Hire the Best Cinematographer For Your Film

The cinematographer, also known as the director or photography (DP) is one of the three key people responsible for the look of the movie. With the production designer crafting the look of the environment, and the director responsible for the actor’s performances in that environment, the cinematographer photographs the action, creating a look through light and the lens. That makes hiring the best available cinematographer the smartest decision you can make for your film.

A good cinematographer’s skills are robust:

  • Understand the story and how to ensure each scene has proper coverage
  • Understand the technicalities of lighting and the lens
  • Know how to create emotion through lighting, lens choice, camera movement, and color grading
  • Know how to lead the crew
  • Know how to balance the director’s wishes against the realities of the production – especially if it is a first time or inexperienced director
  • Know what it takes to shoot each scene to make sure the production ends up on time and on budget

These skills and experiences develop over time; through working with different directors on different projects.  Each genre, budget, location, and project type – from commercial to feature film – has its own challenges, and it only through working through these on set that the DP will truly gain experience.

It used to be that many film school graduates began their careers by working in a camera rental facility sweeping floors, driving trucks and trying to make connections with cinematographers as they came in to rent cameras for real productions. If they were successful in making a good contact, they may get a job as a 2nd AC on a feature. The 2nd AC is in charge of loading the film, maintaining camera logs and marking each shot with the clapboard.  After working on a few dozen features as a 2nd AC, he would be able to move his way up to a 1st AC. Responsible for pulling focus, setting up, maintaining and moving the camera, the 1st AC will work in this capacity for several dozen films until he graduates to the camera operator position. After years of working in the camera department, the camera operator may be offered the DP position on a small project.

The second, more common route was through the electric department, from electrician to gaffer to DP.  It’s easier to find a camera operator who knows a particular camera than it is to find a person skilled at lighting, and because lighting is the cornerstone of good cinematography, the best DPs are masters of light.  Yes, knowing the camera is important, but a good DP knows the physics of the lens, understands the dynamic range of the camera’s imaging sensor, and the color curves. As far as the actual operation of the camera itself, he relies on the camera operator and 1st AC to build, set-up, and manage the camera.

Today, with the affordability of high-quality digital camera systems, many aspiring DP’s purchase their own gear and begin a career as a DP, bypassing the traditional Hollywood system. Although these young DPs may know how to produce a quality image, their lack of experience in the production process can be detrimental to you and the movie. Remember a good DP needs two basic skills – a keen photographic eye and the experience to successfully guide the production to completion. Recent film school grads often lack the real-world experience of constructing a long-term production from concept to completion – and you don’t want your film to be their training ground.

When it comes time to hire the DP, consider the following tips to help you find the best, most qualified person:

  • Contact your local film commission, post an ad on craigslist.org or any crew web site, and ask for online links to web sites and demo reels. When you begin looking at DP reels, look at:
    • Are the shots well framed and motivated by the story?
    • Is there a strong visual continuity from shot to shot? Even though this responsibility ultimately lies with the director, if the shots don’t work, then ask why the DP didn’t help the director improve the quality of coverage.
    • Does the lighting have a style that positively contributes to the story? Does the picture look professional? Are there any shots that are over- or underexposed?
    • How does the camera move? Are camera movements necessary and do they contribute to the story, or are they frivolous?
    • Does the cinematography pull you into the story?
  • Meet with prospective DPs to see if your styles are compatible. Look at her demo reel and talk to her about her approach to lighting a scene. Discuss your story and see if it resonates with her. Much like auditioning an actor, your quest to find a cinematographer lies not only in your comfort level with her craft, attitude, and professionalism, but also in her ability to work with you to fulfill your vision.
  • Once you choose your DP, sit down with him and show him scenes from movies that you like the look of. Gather various examples of styles, camera movements, and lighting that you’d like to see in your movie and listen as the DP explains how to approach these styles. You both should be on the same page as to the style and look of the movie, enabling the DP to determine the equipment needed for the production. Discuss:
    • Camera movement: Are you looking for static setups? Tableau shots? Handheld, documentary-style shots? Dolly or crane moves? Steadicam? Long takes? Short takes? How are you looking for the camera to interact with the environment and the set?
    • Lighting: Are you looking for flat (1960s Technicolor), colorful (Amélie), black and white (Schindler’s List), monochromatic (Minority Report) or tinted lighting (The Matrix)?
    • Style: Do you want a documentary (Babel, Traffic), poetic (Amélie), or dramatic (Titanic) style?
    • Editing: How will the movie be cut together? Are you using long shots? Quick, rapid MTV-style cuts?
    • While discussing these elements, an experienced DP will be able to help you balance your vision with the realities of production, scheduling, and equipment availability. Listen to him… he will be your greatest asset on set.
  • Contact other directors with whom each DP worked.  Ask about his demeanor on set, how he addressed challenging situations, and how the crew felt.
  • Contact editors of the DP’s projects to see how well his footage cut together in the editing room. You don’t want to exhaust your resources and money on set only to find that you don’t have proper coverage in the editing room.

The key to a successful collaboration with the DP is open communication of ideas, thoughts, and technical tehniques. Never hesitate to ask questions and always understand the complexities of achieving your vision – always tell the DP what you want and trust him to figure how to do it.

Pre-Production on Low Budget Movies

The process of preparing to shoot a movie can be pretty frustrating because of how many different tasks you as a producer have to juggle. It’s even more challenging when you don’t have a lot of money to spend and you’re wearing multiple hats.

After I wrote a 60-minute period mystery “Time and Again,” I had about six weeks of pre-production, so I had very little time to get everything ready. The trick I found to work is that I started looking for locations immediately, since the entire schedule hinges on their availability.  During the same time, I would stop and visit thrift shops and antique stores to collect props and wardrobe after work each day, storing them in boxes at home until the shoot.  I was also calling prospective crew members and organizing the auditions, while preparing my application for production insurance and contacting the city for shooting permits.

The secret to success is to multi-task and understand that EVERYTHING WILL TAKE LONGER TO DO THAN YOU INITIALLY THINK. Remember that pre-production isn’t difficult, it’s keeping the hundreds of small tasks organized that is the challenge.

I always keep a dry erase board by my desk where I can track of all the small details I need to accomplish, checking off the ones that are finished and always adding new ones.

A few tips I learned during pre-production:

  • Complete the final script, copy and distribute to cast and crew – Nothing happens without the script, so save your (and everyone else’s) time by finalizing the script before you start pre-production.
  • Breakdown the script, create production board and make the production schedule – The sooner you can determine the number of shooting days, how much you can afford to spend each day, and when you are planning on shooting, the sooner you can ask people to get involved. With a schedule in hand, you can ask “Are you available on X day.”  “Can I use your lighting gear the afternoon of Y day?”
  • Set-up a production office and bring on necessary resources –  And yes, your production office can be your home.  Just be ready to have a lot of people coming and going, equipment, props and costumes stacked up, and room for a table and chairs for conferences and meetings.
  • Set-up insurance, bank accounts and company structure –   It’s always wise to separate the production from your personal life.  This keeps your finances separate, but protects your personal assets in case someone gets hurt on set.  Always hire a good attorney and accountant to help.
  • Begin location scouting – Start this right away.  Locations are not always easy to find, and the sooner you can start looking, the better.  Also remember that you don’t have a location until you have a signed location agreement.
  • Begin scheduling auditions for principal actors and extras – Contact local talent agencies to assist.
  • Begin talking with crew members, focusing on main crew positions –  Call the film commission for the production manual that lists all local crew members. If you time your production right, you may get some amazingly talented and qualified crew people if you schedule your shoot off-season.
  • Prepare agreements, deal memos and contracts with cast and crew – You can download all the contracts and forms you need from FilmSkills, but always consult an attorney for any legal documents you plan on using.
  • Review budget with newly hired crew members to determine feasibility – You hire qualified department heads for a reason, so listed to them.  They will tell you if your vision is attainable, and if not, what you can adjust to make it happen within your budgetary restrictions.
  • Research and assemble props and costumes – Start this right away, and keep an eye out everywhere you go.  Also use FaceBook and other social media to put word out for any unique props or costumes. You never know what someone may have gathering dust in their basement.
  • Contact local film commission and establish relationship for permits and city services – Never shoot without a permit. You’d be surprised how many cities are willing to work with new filmmakers.
  • Begin set construction and set decorating – If you need help building sets, contact a local general contractor.  While they usually build additions, renovate office buildings, and build homes, a GC may be up for the challenge of building a movie set.  He may even have access to scrap materials to help you cut your costs.
  • Negotiate with vendors for cameras, lighting and grip equipment – Again, if you time your production so it doesn’t coincide with another film, you may be able to get your gear for a great deal (or even free). Offer to plug the rental facility in your social media to help.
  • Contact post-production services including editors, composers and visual effects artists – It’s never to early to think about production, and the sooner you do, the more help you will have on set. It’s better to start the editing process as early as possible so you can pick-up any missing shots while you are still in production.

All in all, start early, be prepared, and surround yourself with people who know what they’re doing. It will help you, and ultimately, the project.

How to Find a Writing Partner and Keep Your Sanity

Writers tend to be stronger in either structure or dialog and character, so finding a writing partner who complements your skills can lead to a much better script. Finding a competent writing partner can be as easy as contacting local writing organizations, colleges, or university programs with writing courses or seeking writers online or through industry contacts. When looking for a good writing partner:

  • Ask for a writing sample – Read through the writer’s past works to see if his style, ability to write dialog, pacing, dramatic moments, structure, and plot twists are on par with the nature of the story. To get an idea of the writer’s ability, read the first 20 pages of his previously written screenplays and see if the script engages you. If so, keep reading. If not, consider finding another partner.
  • Find a partner whose strengths are your weaknesses – If you are good at structure, then find a writer who is good at dialog and characterization. A good writing partner will bring additional talents to the table and balance your skill set.
  • Talk with your potential writing partner about the story and make sure she likes the genre, story, and characters before working with her – For example, if you are writing a romantic comedy, look for partners who specialize or have an interest in writing romantic comedies.
  • Make sure your partner has the time and commitment to work on the script, especially if it’s being written on spec (for free) – It’s difficult to complete a screenplay if your partner has to drop out in the middle of the project or has obligations that may interfere with his ability to work on the project. Write and sign a contract that outlines the details of your working relationship together. Understand that when working with a writer, you both own 50 percent of the script, so if any problems occur during the relationship, the project may go unproduced.
  • Work out the credit she will receive as well as payment terms if the screenplay is sold, optioned, and/or produced – It’s vital to work out the details of your business relationship before beginning work on a script, should any problems arise during or after the writing process.

Ultimately, a compatible partnership is as much about chemistry as it is about artistry – find a person with the same goal as you, who compliments your vision but completes your skill set.  A rewarding writing partner can be both inspiring and motivating – both traits will have a positive impact on the script.

Get Off Your Ass and Start Writing Your Screenplay

I’ve always hated writing… it requires discipline, focus and a willingness to go back and rewrite something again and again.  I know that I’m not the only person who feels this way. Lots of my writing friends agree that writing the script is one of the most difficult parts of making a movie; it’s not fun, social, or exciting.  Writing is a tough process that involves you, your computer, and your life experiences.

So how do you start writing? Well.. the question has the answer built in… you JUST START.  Follow the easy steps in this chapter to help you break into the first page. After that, it’s up to you to find the motivation to write.

When I wrote “Time and Again,” I was really inspired by the idea of a man escaping from jail and appearing in the middle of an open field. I started writing down ideas I had had about where he ends up, who he meets, where and when he goes… all these questions helped me make a list of unconnected ideas that further spurned additional ideas. As I kept writing down ideas, the plot eventually came into being.  The more ideas I had, the more I was able to work the plot.

Once I had an idea of where the story was going, I called Bob Noll, a friend of mine at John Carroll University. We had discussed the idea for this story and he agreed to help me write it.  We spent numerous nights at his office, brainstorming and developing the characters, fleshing out scenes and ultimately developing an outline that was strong enough to begin turning into a script.

I would think of the story in terms of how the audience would see it… one scene at a time, from the beginning to the end. As I thought about these ideas, Bob would type them into the computer in an outline form.  Sometimes we would write dialogue, sometimes only the character’s actions. But whatever we wrote, our goal was to capture the spontaneous thoughts and ideas we had to paper so we could later go back and rewrite and tighten the story.

As much as I hated writing, I always looked forward to these writing sessions because they helped me as the filmmaker more deeply explore the world of our characters.  I found that I really enjoyed the creative, brainstorming part of writing and Bob was really good at translating my ideas to the page.  Our partnership began to take form as I would pace in his office and, following the outline of the plot points the story needed to hit, develop exciting scenes that would get our character from one plot point to the next in an exciting, unpredictable manner.

We usually only worked for a few hours a night.  Beyond that, our brains would turn to clay and the creativity valve would shut off.  Even if we tried to push longer, the material we wrote looked really bad when we came at it again with fresh eyes the next day.  The lesson I learned was to listen to my mind.. when it got tired, we quit for the night.

The process of writing the script from the outline was pretty simple.  The more detailed the outline, the easier the process of writing the script. Completing the first draft, no matter how good it is, is the first crucial step in making a good story.  Revising and rewriting the story to make it tighter, better paced, to make the characters stronger and the dialogue more snappy was a lot easier once we got past the hurdle of completing the first draft.

We went through several revisions of “Time and Again” before we were happy with the script and felt like it was time to go into pre-production.

The Sun – A Cinematographer’s Biggest Light Source

Summertime is finally here, and so are challenges of shooting outdoors in the harsh summer sun. Although the winter months provide us with plenty of diffused cloud cover to properly expose out actors, the harsh, direct summer sun can be problematic when the light and shadows fall outside the contrast ratio of the camera.

In working with the sun, treat it in the same way you’d treat the key or rim light. The only difference is that you need to move the subject and camera to position the sun in the ideal location. Many times, locations are selected because of their east-west orientation, enabling the Director of Photography and 1st assistant director to schedule specific shots based on the sun’s position.

Working with sunlight begins by choosing the position of the subject relative to the position of the sun. There are two ways to approach shooting using the sun as the primary light source:

  • Use the sun as the key light – Position the actor so the sun is illuminating the far side of the actor’s face, opposite the actor’s eye line. This is much easier to do before 11:00 AM and after 4:00 PM, when the sun hangs lower in the sky. Avoid shooting near noon, because the sun tends to cast shadows on the actor’s brow, creating deep, cavernous shadows over the actor’s eyes. Use a bounce board to fill in some of the shadows, especially if the sun is too direct.
  • Use the sun as a rim light – Position the actor so the sun is positioned behind her, then use a bounce board or reflector to bounce the sunlight as the key light. I would recommend using a silver reflector available at most camera stores.

Here are some tips for getting a great shot in direct sunlight:

  • How much workable daylight is there – The 1st assistant director will look at the script and estimate the amount of time needed to shoot a particular scene, or to shoot all the scenes at one given location. He will then determine whether there is enough workable sunlight to be able to complete your shot list.
  • How much time will it take to chase the sun – Chasing the sun is a term that refers to the constant adjustments to the grip equipment needed to compensate for the sun’s movement. Reflectors, diffusion and overheads all need to be moved, which takes time and manpower. The schedule will determine whether the day will permit extensive rigging changes.
  • Are there geological or architectural features that will cut into the sunlight – Sunlight calculators provide sunset and sunrise times based on the moment the sun crests the horizon to the time the sun dips below the horizon. The actual time may vary if the sun travels behind a building or a mountain range. Often, location scouts will perform a light survey, during which they sit at a location all day and note the exact times of direct sunlight. These times are important to know when determining the daily shooting schedule.
  • Plan for lighting changes – A good director of photography will be able to plan not only camera angles to allow a consistent look of the lighting throughout the day, but determine a way to shape the changing sunlight so the look of the final footage is consistent in the scene. Often this involves flying a large 20’x20’ silk over the set so direct sunlight is diffused, then focusing the direction of the sunlight with shiny boards.
  • Be prepared for weather changes – Even the best-laid plans are subject to a cloudy day, where overcast conditions make it much more difficult to reflect light. Instead of bouncing light to increase the illumination levels on one side of your subject, DPs will use solids to reduce the light, creating negative fill on the opposite side of the actor. Whether you add light to one side or subtract light from the other, the goal is to create a consistent contrast ratio from shot to shot.
  • Make sure you have room to rig – Reflectors and overheads can take up a lot of space, so when scouting a location, make sure there is ample room to rig the necessary fixtures. Sometimes, it becomes necessary to place reflectors on nearby building rooftops, or rig overhead silks to a neighboring structure. Be sure to discuss these requirements with the location manager so she can secure all necessary permissions and permits from surrounding property owners.

Remember, the sun is a giant light source that can be diffused, bounced, reflected and blocked. With a little creativity, you can help shape sunlight to create the best possible image for your production.

Directing – It’s All In the Script

Although we all think of the director as exerting his or her influential on set, in reality the director’s work is mostly done well before hand in pre-production. It’s easy to get overwhelmed by the complexities of production. From working with difficult actors, to fighting the setting sun, to trying to overcome problems with the location, it’s easy to lose sight of the fragility of the emotional moment you’re tasked with creating amid this chaos. As a result, it’s always best to do your homework in a quiet environment, and look to your script for the answers.


Prep is where the big part of the director’s job happens. That’s where we figure out: what is this scene really about, what is the story I’m telling, what is the emotional point of view of each character, and what is the intent and obstacle of each character? Now how do I illuminate that by how I shoot this scene? Where do the characters want to be physically in the set, and how do I demonstrate that with a camera? I cut it all together in my head before I shoot a single thing, so that my screen direction will be correct. And so that I can answer any questions that an actor might have about intention, or about obstacle, or about subtext, or about point of view. I have to know it all through and through and completely, know it cold. Once I know that, I can come on set that day and throw it all away, just like an actor does, and let the magic happen.


– Bethany Rooney, Critically Acclaimed Director, “Brothers and Sisters”, “Grey’s Anatomy”, “Desperate Housewives”, and “Private Practice”


Here are a few tips to get the most from your script before you start shooting:

  • What is this scene about? Know the complete story arc of both the A-story and each subplot.  Work through how each scene moves the story forward and the narrative purpose of each scene. Determine what each character wants in each scene, where each character is going, and where each character is coming from before the scene begins.
  • How does it fit into the scene that came before and the scene that comes next? Determining this will help you design transitions to segue from one scene into the next scene.  Let the emotion, energy, and pacing of each scene guide these transitions.
  • What is each character’s motivation in this scene? Perform a character analysis for each and every scene.  You can learn more about this process in the chapter,  “Analyzing Character.”
  • What is the driving subtext of each line of dialog? Invariably, actors will ask you why their characters are saying a particular line, so be clear what each character really means, and why he or she is covering this truthful subtext with the written line.
  • What does each character really want and is he/she speaking the truth or masking it? While dialogue can seem to be a truthful representation of how a character feels, it probably isn’t.  Look at the scene to determine why the character is masking or revealing his true intentions.
  • How would you like the lighting and cinematography to serve the theme?  In addition to the performance, determine how the other creative elements of filmmaking will work to enhance the emotion of each scene.  From the blocking of the camera to sound design,  understanding how the technique can adorn the actor’s performance can greatly enhance your control of the moment.

By unraveling and understanding these three principles in advance, you’ll be able to much more effectively tackle each scene on set.

How to Shoot a Short Film

So, you’re thinking about shooting a short film? Short films are a terrific way of learning the process of making a movie, showcasing your talents, and generating interest from producers and investors in future projects.

Despite the educational and career benefits, there is virtually no market for short films, making it nearly impossible to see a return on your investment. While there are a few distributors who may release a compilation DVD of short films, filmmakers rarely see their money back or see distribution of a short film by itself.

If I can give one piece of advice from the years I’ve been working as a filmmaker, it is to produce several short films before tackling a feature. The process of learning how to make a movie is cyclical, meaning you have to go through the entire process at least once just to begin understanding the craft.


For example, much of directing stems from understanding the editing process and the way shots work together to make a scene.  Understanding just this one aspect will have a huge impact on your choices for camera placement and pacing when directing on set.


Don’t turn your star idea into your first film… you’ll regret it for your entire career.  Start small and learn the process with a short film, then with the second and third films, hone the craft of directing, working with actors and directing the camera.  You will know when you’re ready to take on a feature.


– Jason J. Tomaric, Emmy-Winning Director


The power of a short film is that a viewer can watch your work and see an entire story arc without a big time commitment.  This is really important in Hollywood as you start marketing your talents to producers, agents, and managers.  They are all extremely busy, and won’t have time to commit to a new filmmaker’s project without a lot of buzz.  This is why a short film is a great calling card.

  • A viewer can watch your short without a big time commitment – This will make it more likely for them to see the entire film
  • You can invest your time and resources into only a few minutes – If you have $10,000 and two months, you will produce a better quality 2-minute short film by focusing those resources on 2-minutes than on a 90-minute long feature film.
  • You have more distribution options – You can easily release your short on youTube, Vimeo, post it on blogs, and even stand a better chance of being accepted into a film festival.  It’s easier for a festival programmer to fit a 2-3 minute short film than a full feature.
  • It’s a great way to practice your craft – The only way to become a better filmmaker is to practice, practice, practice.  Shorts are an outstanding tool to craft a story in three acts, create compelling characters, and emotionally engage your audience.  If you can do it in 2 minutes, then you’ll be able to do it over a 90-minute feature.
  • They don’t have to be complicated – You can shoot a compelling story in your own living room with one actor.  Short FilmSkills aren’t about scope – they are about telling an emotionally compelling story in a short time frame.
  • Don’t expect to make your money back – There isn’t a financial model or market for short films, so when you produce one, be prepared to invest in your craft and in a great calling card.  You probably won’t see a direct return on your investment.


So what are you waiting for?  Get out there and shoot your short film!